
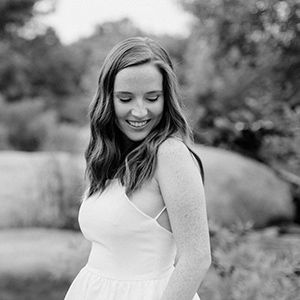
When Finn was born, we had his newborn and first family photos taken by the wonderful Denise Feagans Photography. Naturally, we were (and still remain) in love with her photos of our sweet little redhead. I had this vision for what I wanted to do with those photos, and it included much more than simply framing them and hanging them on the wall. I wanted to showcase them. I looked into creating them into wrap canvases... but SWEET CHEESUS, have you seen how expensive they are? To get everything I wanted I probably would have had to sell Finn on the black market. No thanks.
A little dismayed but deeply motivated, I took to Pinterest to find a new idea. I came across a pin that linked me to Ginger over at Literally Inspired on how to create canvas photo look-alikes for a FRACTION of the cost. Color me thrilled! I wasn't going to have to sell my baby after all!

For this project, you need only simple materials. Pictures, canvases (mine are from Hobby Lobby), black paint, mod podge and an application brush. I bought my pictures from mpix. Although they can be a bit pricier than other online printers their quality is amazing, and I happen to believe you get what you pay for. For the application brush, I had success using a 1 inch sponge brush leftover from a previous project.
Step 1: Paint the edges of your canvas black. I did two coats.

Step 3: Working quickly, place the photo face up on the canvas. Smooth out. I had little (as in zero) trouble with bubbles, but that was probably because of the weight of the photos I had.
Step 4: Spread a thin layer of Mod Podge over the top of the photo. I debated about whether to complete this step (fear of ruining those pricier photos, you know), but ultimately I am beyond happy I did. I did a layer of horizontal swipes followed by a layer of veritcal swipes. I found this gave my pictures an almost-canvas look to them, which after all was the look I was going for.
That was it! Super simple! Dearest husband hung them for me and is convinced we now need a few more to even out the look. I might just oblige him.


Love it! You did a beautiful job! <3 Hannah
ReplyDeleteThanks, Hannah! I was very happy with how they turned out! :)
Delete